 Save to Pinterest
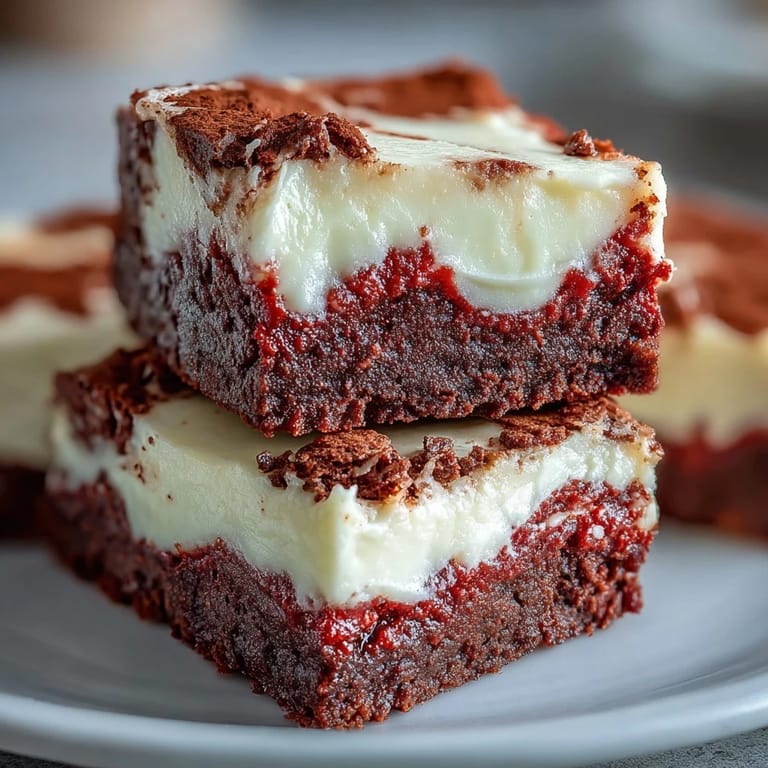
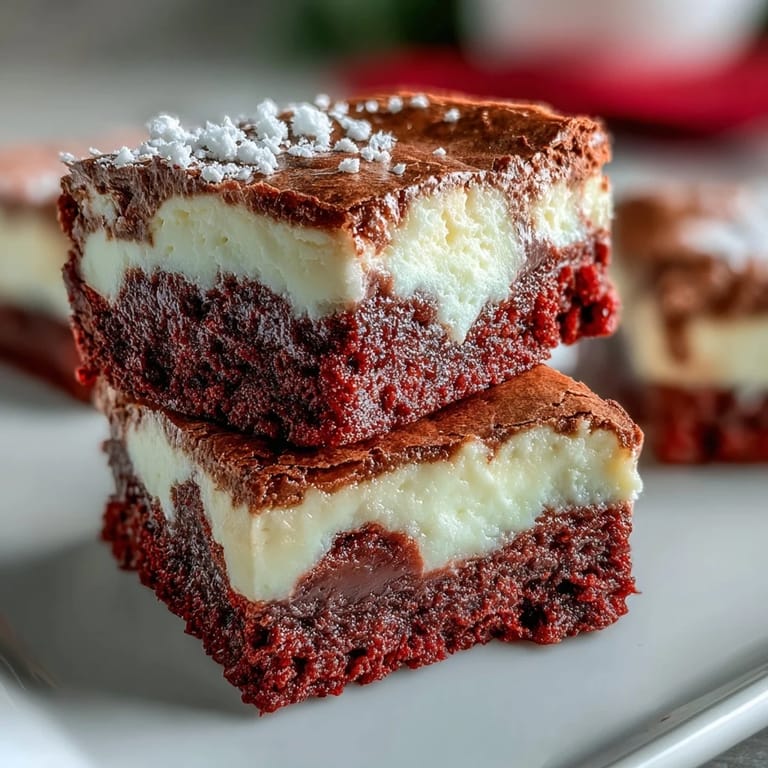
 The kitchen was unusually quiet that Saturday afternoon when I decided to try layering two of my favorite desserts into one pan. I'd been craving something dramatic for a friend's birthday, something that looked impressive but didn't require piping skills I didn't have. The idea of swirling rich red velvet with tangy cheesecake felt almost too indulgent, but I melted the butter anyway. What emerged from the oven an hour later was striped, glossy, and exactly the kind of showstopper I'd hoped for.
I brought these to a potluck once, still cold from the fridge, and watched people hesitate before taking a square. The deep red against pale cream looked almost too pretty to cut into. But once the first person took a bite and made that little mmm sound, the whole pan disappeared in minutes. Someone asked if I'd ordered them from a fancy bakery, and I just smiled.
Ingredients
- Unsalted butter: Melted butter blends smoothly into the batter and gives the brownies that fudgy, dense crumb you want in every bite.
- Granulated sugar: Sweetens both layers and helps create the shiny, crackly top that makes brownies so irresistible.
- Eggs: Room temperature eggs mix more evenly and help both the brownie and cheesecake layers set without curdling.
- Vanilla extract: A teaspoon in each layer deepens the flavor and makes the whole dessert smell like a bakery.
- Red food coloring: Gel works best for vibrant color without thinning the batter, but liquid works if that's what you have.
- All-purpose flour: Just enough to give structure without making the brownies cakey or dry.
- Unsweetened cocoa powder: Adds that classic red velvet cocoa hint without overpowering the tangy cheesecake.
- Cream cheese: Softened completely so it whips smooth and creamy with no lumps in the swirl.
Tired of Takeout? 🥡
Get 10 meals you can make faster than delivery arrives. Seriously.
One email. No spam. Unsubscribe anytime.
Instructions
- Preheat and prep your pan:
- Set your oven to 175°C (350°F) and line your square pan with parchment, letting the edges hang over like little handles. This makes lifting the whole slab out later so much easier.
- Mix the red velvet base:
- Whisk melted butter and sugar until it looks glossy, then beat in eggs, vanilla, and that bold red coloring until the batter turns a deep, velvety crimson. Sift in flour, cocoa, and salt, folding just until no streaks remain.
- Reserve some batter:
- Scoop out about a quarter cup of the red velvet mix and set it aside in a small bowl. Spread the rest evenly across the bottom of your prepared pan.
- Whip up the cheesecake layer:
- Beat softened cream cheese until it's completely smooth, then add sugar, egg, and vanilla, mixing until the mixture is silky and lump-free. Pour this gently over the red velvet base and smooth it out with a spatula.
- Create the swirls:
- Drop spoonfuls of that reserved red batter on top of the cheesecake, then drag a knife or skewer through in loops and zigzags. Don't overthink it, random swirls look the most natural.
- Bake until just set:
- Slide the pan into the oven for 35 minutes, watching for the center to look barely firm and a toothpick to come out with a few moist crumbs. Overbaking will dry out the fudgy texture you're after.
- Chill completely:
- Let the brownies cool to room temperature on a wire rack, then refrigerate for at least two hours. Cold brownies slice cleanly and the cheesecake layer firms up beautifully.
 Save to Pinterest
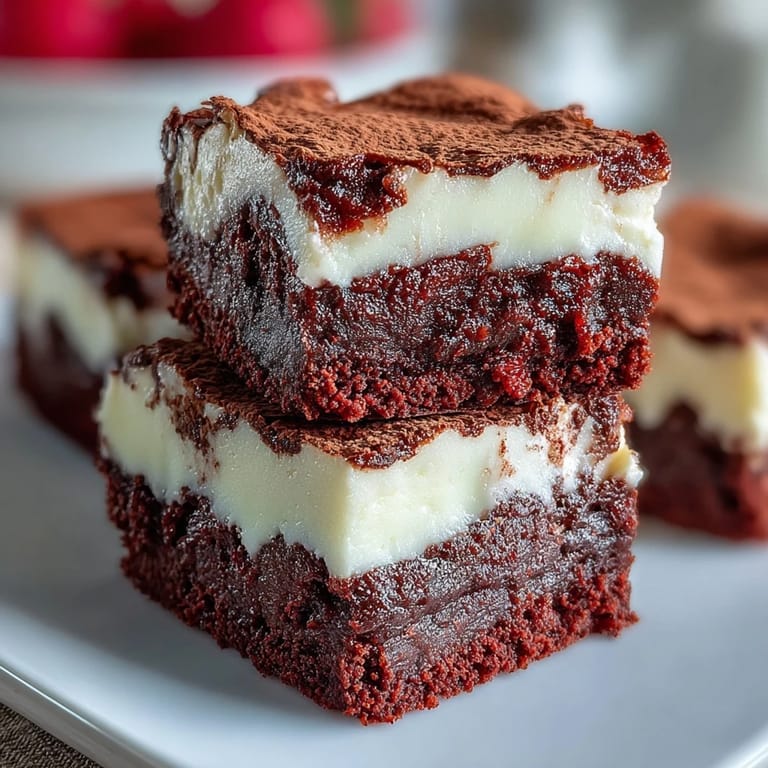
 The first time I made these, I panicked because the cheesecake layer looked too pale next to the vibrant red. But after baking, the contrast was exactly what made them stunning. My neighbor spotted them cooling on the counter through the window and knocked on the door to ask what smelled so good. I handed her a square still warm from the oven, and she declared it the best brownie she'd ever tasted.
Getting the Swirl Just Right
The swirling part feels intimidating, but it's actually the most forgiving step. I used to try for perfect spirals, but random, organic swirls always looked better. Use a butter knife or a wooden skewer and drag it through the layers in loose S-shapes or figure-eights. The key is not to over-swirl, a few confident strokes create drama, too much mixing muddies the colors into a murky mess.
Storage and Make-Ahead Magic
These brownies actually improve after a day in the fridge. The flavors meld and the texture gets even fudgier. I store mine in an airtight container between layers of parchment paper, and they stay perfect for nearly a week. You can also freeze individual squares wrapped tightly in plastic wrap, then thaw them in the fridge overnight whenever a craving hits.
Variations Worth Trying
Once you've nailed the basic recipe, it's fun to experiment. I've folded white chocolate chips into the red velvet batter for extra sweetness, and I've swapped the vanilla extract in the cheesecake for almond extract for a subtle nutty note. A friend of mine adds a tablespoon of espresso powder to the cocoa for a deeper, more complex flavor.
- Sprinkle mini chocolate chips over the cheesecake layer before swirling for pockets of melty chocolate.
- Dust the tops with powdered sugar just before serving for an elegant, snowy finish.
- Try using pink or purple food coloring for a fun twist on special occasions.
 Save to Pinterest
 These brownies have become my go-to whenever I need to impress without spending all day in the kitchen. They look like you fussed, but really, it's just two simple batters and a little swirl.
Recipe Questions & Answers
- → Can I use natural food coloring instead of artificial?
Yes, you can substitute with natural red food coloring, though the color may be less vibrant. Beet powder is a popular natural alternative.
- → Why do my brownies need to be refrigerated before cutting?
Refrigeration allows the cheesecake layer to set properly, making it much easier to cut clean squares without the filling oozing out.
- → Can I freeze these brownies?
Absolutely. Wrap individual brownies tightly in plastic wrap, then store in a freezer-safe container for up to 3 months. Thaw in the refrigerator overnight.
- → What's the best way to get smooth cream cheese filling?
Make sure your cream cheese is fully softened to room temperature before mixing. This prevents lumps and ensures a silky, smooth cheesecake layer.
- → How do I know when the brownies are done baking?
The center should be just set and slightly jiggly. A toothpick inserted should come out with a few moist crumbs, not wet batter or completely clean.
- → Can I make these in a different pan size?
Yes, but adjust baking time accordingly. A 9x13 inch pan will require less time, while smaller pans need more. Watch for the set center as your guide.