 Save to Pinterest
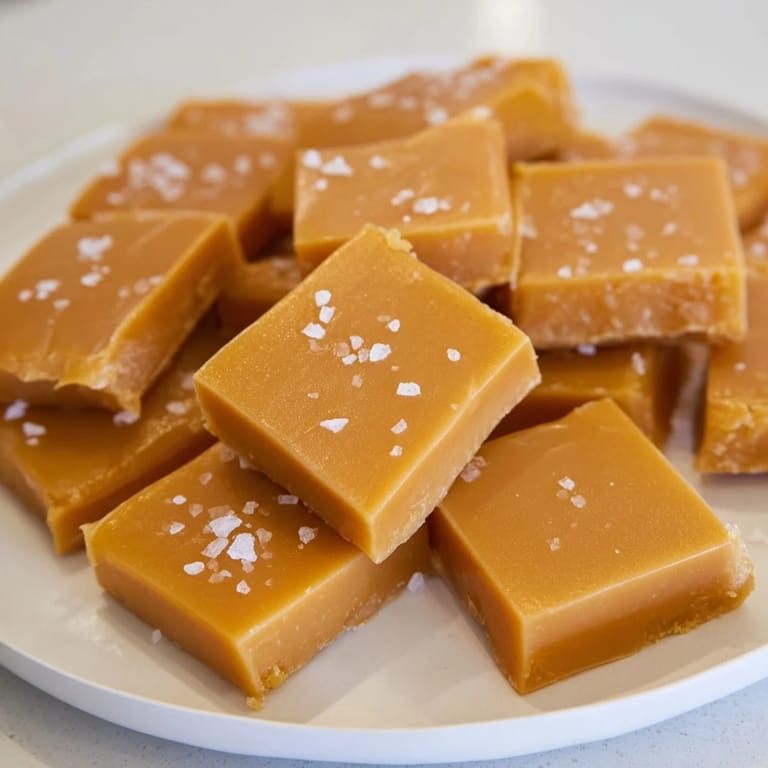
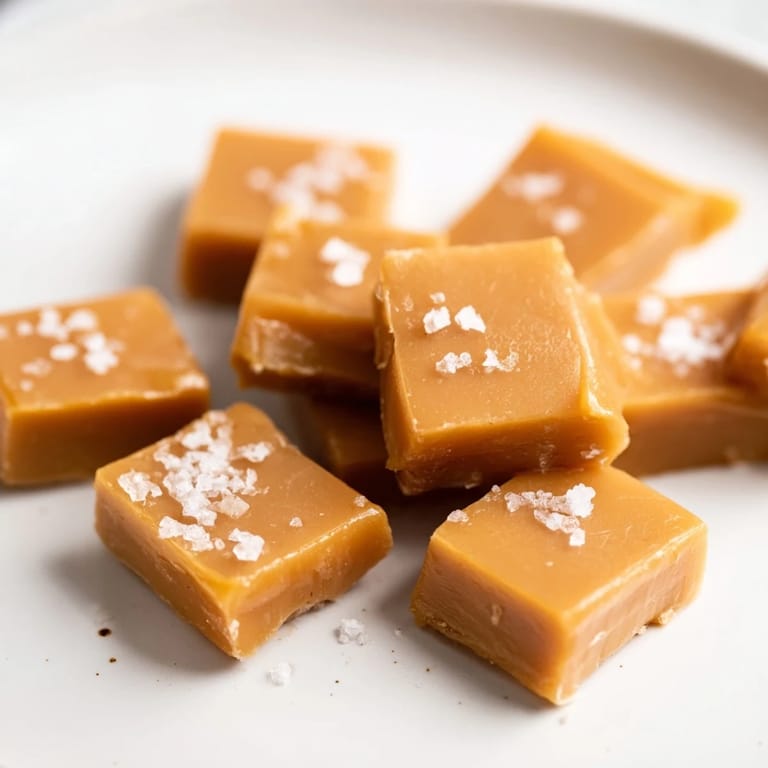
 There's something almost meditative about watching sugar transform in a hot pan—the way it goes from granules to liquid gold, catching the light like amber. I discovered sea salt caramels by accident one afternoon when I was trying to fix a batch of plain caramels that tasted a bit too one-note, reaching for the Maldon salt on impulse. That spontaneous pinch changed everything, and now I can't imagine caramels any other way.
I made these for my neighbor one holiday season, and she returned the empty box with a note asking if I was willing to make them again. That one box led to me spending an entire weekend in the kitchen, talking on the phone while stirring caramel, genuinely happy about it.
Ingredients
- Heavy cream: Use the real thing—it's what makes these caramels silky instead of grainy, and it's worth every bit of richness.
- Unsalted butter: Cut into pieces so it melts evenly into the cream without any temperature surprises.
- Granulated sugar: The foundation that becomes your caramel base.
- Light corn syrup: Prevents crystallization and keeps your caramel smooth.
- Water: Helps dissolve the sugar evenly at the start.
- Pure vanilla extract: Stir it in at the end to keep its flavor bright.
- Fine sea salt: The salt folded into the mixture—use fine grain here.
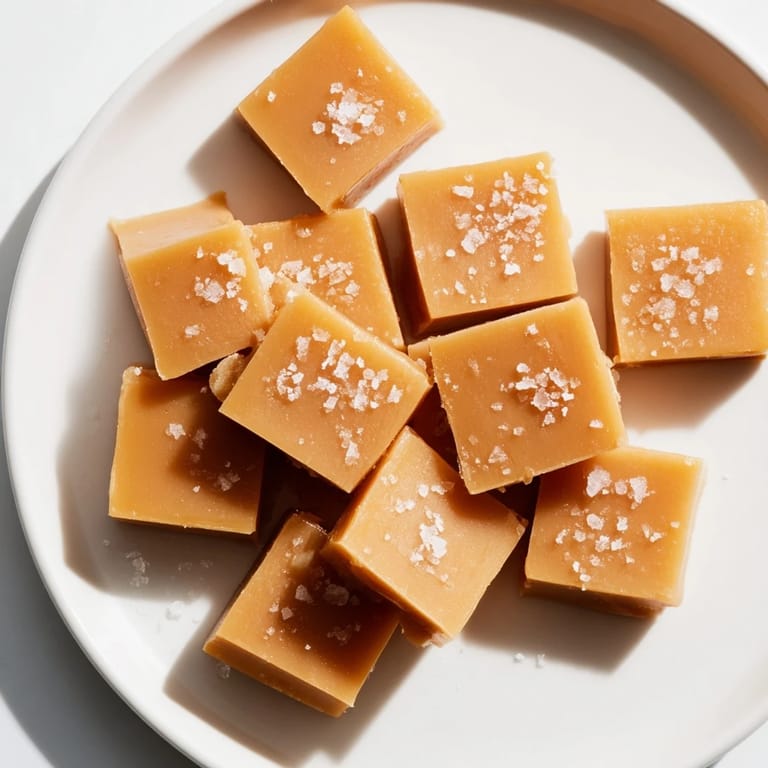
- Flaky sea salt: The finishing touch that makes people pause and notice.
Tired of Takeout? 🥡
Get 10 meals you can make faster than delivery arrives. Seriously.
One email. No spam. Unsubscribe anytime.
Instructions
- Prep your pan:
- Line an 8x8-inch pan with parchment paper, leaving overhang on two sides so you can lift everything out cleanly later. Butter the parchment lightly—this small step prevents sticking disasters.
- Warm the cream:
- Combine heavy cream and butter pieces in a small saucepan and warm over medium heat until the butter melts and everything is hot but not boiling. Set it aside somewhere safe.
- Start the caramel:
- Pour sugar, corn syrup, and water into a large, heavy-bottomed saucepan. Stir gently just to combine, then let it be—no more stirring after this point.
- Cook to the right color:
- Increase heat to medium-high and let it bubble away without touching it. Watch as the edges turn golden, then the whole pan gradually shifts to light amber. When a candy thermometer reads 320°F (160°C), you're there.
- The big moment:
- Carefully pour the warm cream mixture into the caramel—it will bubble up dramatically and look a little chaotic, which is exactly right. Stir constantly and keep cooking until the mixture reaches 245°F (118°C) for soft caramels or 250°F (121°C) if you like them firmer.
- Finish and pour:
- Remove from heat and stir in vanilla extract and fine sea salt, then immediately pour into your prepared pan. After 5 minutes, sprinkle flaky sea salt across the top in a light, even layer.
- Cool and cut:
- Let everything cool completely at room temperature for about 2 hours—patience here makes a real difference. Lift out using the parchment overhang, then cut into 1-inch squares with a sharp knife dipped in warm water between cuts.
- Wrap and store:
- Wrap each caramel in wax paper or cellophane to keep them from sticking together.
 Save to Pinterest
 The best moment came when my daughter bit into one and went silent for a second, then asked if she could help make the next batch. Suddenly these little candies became our Sunday afternoon thing, and the kitchen smelled like butter and possibilities.
Why Brown Butter Changes Everything
If you're looking to deepen the flavor, brown the butter before adding it to the cream. The nutty, toasted notes you get from this one extra step make people ask what your secret ingredient is—and honestly, it's worth the small extra effort of watching butter foam and listening for that moment it stops sizzling.
Storage and Shelf Life
Keep them in an airtight container at room temperature and they'll stay perfect for up to two weeks. I've never actually had a batch make it that long, though, so I can't speak from experience on that part.
Making Them Your Own
Once you've mastered the basic version, the world opens up. Dip finished caramels in melted dark chocolate for a decadent twist, or experiment with different finishing salts if you get adventurous.
- Dark chocolate dipping adds sophistication and makes them feel fancy enough to gift.
- Try different finishing salts—rose salt, smoked salt, or even a tiny sprinkle of fleur de sel each tell a different story.
- These scale beautifully, so doubling the batch for a crowd is entirely manageable.
 Save to Pinterest
 These caramels remind me that sometimes the smallest additions—a sprinkle of flaky salt, a moment of attention—transform something ordinary into something people remember. That's the real magic.
Recipe Questions & Answers
- → How do I achieve soft texture in caramels?
Cooking the sugar mixture to around 245°F (118°C) and then combining it with warm cream and butter ensures a tender, chewy texture. Avoid overheating to keep softness.
- → What type of salt is best for finishing?
Flaky sea salts like Maldon add a light crunch and bright contrast to the rich caramel, enhancing flavor without overpowering the sweetness.
- → Can I make these caramels ahead of time?
Yes, store them in an airtight container at room temperature for up to two weeks to maintain freshness and softness.
- → Why is parchment paper used for the pan?
It prevents sticking and makes removing the set caramel easier, especially with overhanging edges for lifting.
- → What’s a way to deepen the caramel flavor?
Browning the butter before warming it with cream adds nutty, rich undertones that elevate the overall taste.
- → How can I prevent caramels from sticking together?
Wrapping individual pieces in wax paper or cellophane helps keep them separate and maintains their shape.